Facebook Shop Integration Magepow Extensions
Magento Extension Document
- By: Magepow Extensions
- Ticket Support: http://alothemes.com/ticket
- Video Tutorial: https://www.youtube.com/channel/UC_xyPf-rd1QrMfBCxcvXuzg
I - Installation
1 - Prepare your Magento
- It is recommended to install the extension on a test server before you install it in a live store.
- Backup Magento files and the store database. Important: Creating backup before installation of any extensions in Magento is extremely important,especially when are working on a live store.
- Disable Compilation Mode in System >Tools > Compilation.
-
Disable:
- Magento Cache (refer to II.1.2 Disable Cache For Details)
- Full page cache and caching module for Magento (such as Speedster)
-
Any Additional cache on your server,PHP cache engines,APC,etc.
Important: When developing your Magento store, in order to be able to see changes immediately, you should completely disable the cache.You can enable it after you finish configuring your store. - Remove all possible custom modifications of the Magento “base” theme. "alomagicproduct"(same as any Magento theme) relieson “base” theme,so any modifications of the “base” theme can change the default behavior of alomagicproduct and break some functionality.You should never edit“base” theme's files.
- Log out from Magento admin panel. Do not just close the browser window: you need to click Log Out link to refresh the access control system.
2 - Install
2.1 Install Extension
Please following steps below:
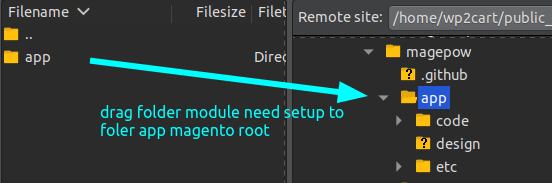
Step 1: Upload the whole Extension package (app folder ) to your server.

Update extension to your server or copy folder app above to your Magento in localhost.
Step 2: Install extension
After the successful installation you have to run the command on Magento2 root directory
commandline: php bin/magento setup:upgrade

Also, run this commands in the Magento2 Root.
commandline: php bin/magento setup:static-content:deploy -f
You can refer the below screenshot.

After running the command, you have to log into the admin panel and you have to clear the Cache.
You can refer to the below screenshot.

Step 3: Finish installer.
II - How to use extension
The following chapter describes some of the basic Magento settings and features. Please note that as authors of this theme we provide support only for the issues related strictly to the extension. Support for Magento configuration/ installation/ maintenance etc is beyond the scope of our support. This chapter should be only treated as a starting point, more information about Magento can be found in Magento documentation : Magento help
1 - Key features of Magento 2 Facebook Shop Integration Extension:
- Integrates store products with the Facebook shop.
- Redirect customers directly from the shop on Facebook to payment in the Magento 2 store.
- Bulk product upload via CSV in the admin config.
- Use the "Add New Mapping" button to create new attribute mapping for the required and other missing fields.
- The required fields for which the extension cannot create the mapping, create it by adding new attribute code.
- Select the Facebook attribute code and the Magento attribute code to add a new mapping for Facebook fields.
- The "Product Feed CSV Log" grid lists the CSV generation log details like start date, finished at, triggered by, product IDs, status and message.
2 - General configuration
After Enable the modul,tTo setting and config the module. Go toAdmin Panel > Stores > Settings > Configuration > Magepow > Facebook Shop Integration > General Configuration
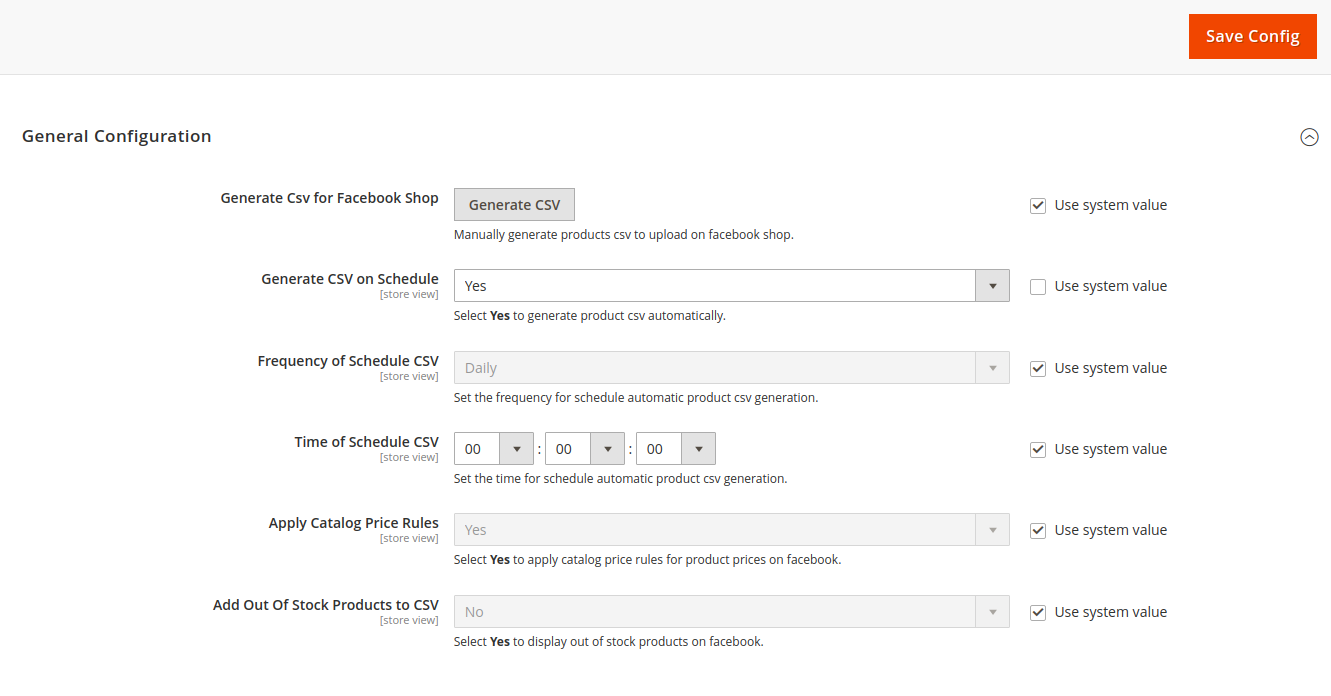
- Generate CSV for Facebook Shop: Choose Yes to create a product CSV automatically according to settings.
- Generate CSV on Schedule: Show/hide Show number of products beside tags.
- Frequency of Schedule CSV: Set the frequency to schedule automatic product CSV generation by day, month, or year.
- Time of Schedule CSV: Set the time for schedule automatic product csv generation.
- Apply Catalog Price Rules: Select Yes to apply catalog price rules for product prices on facebook.
- Add Out Of Stock Products to CSV: Select Yes to display out of stock products on facebook.
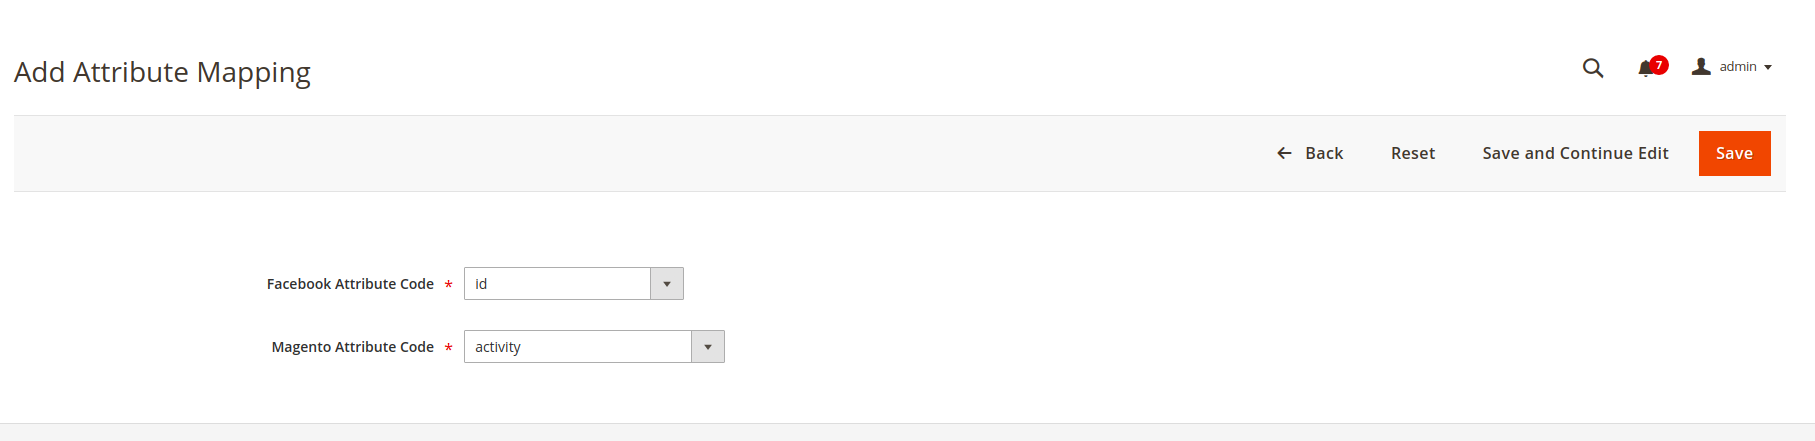
2.1: List Facebook attribute and add new attribute Facebook shop integration.
Login to Magento Admin > Magepow > Facebook Attribute Mapping > Add New Attribute, choose the Facebook attribute code and Magento attribute code you want => Click Save.
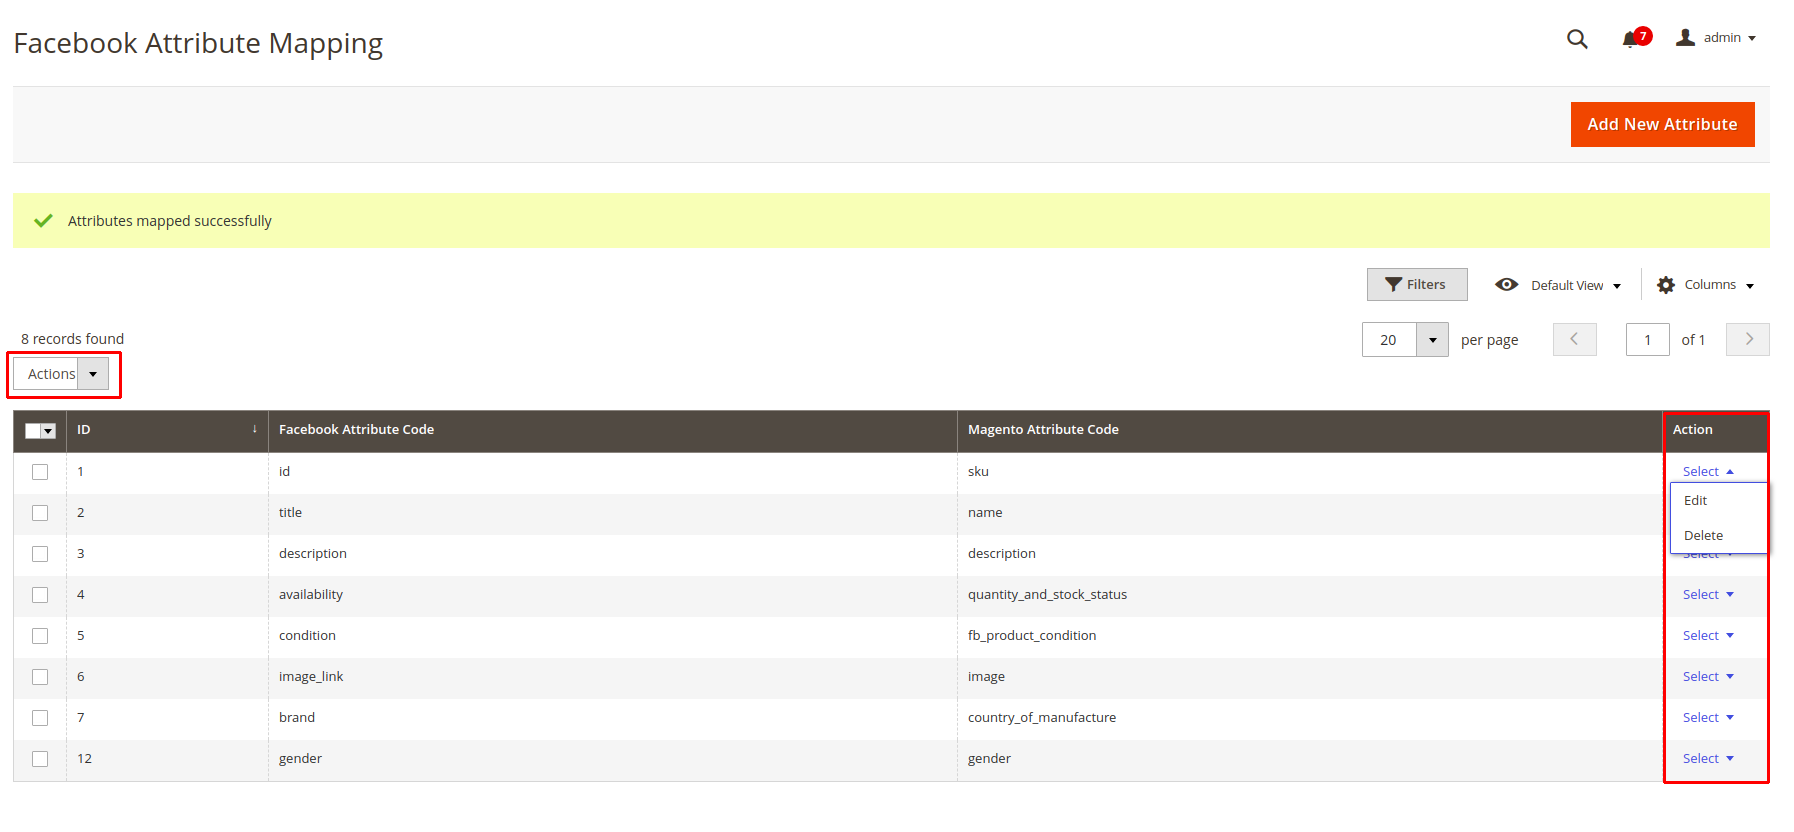
- After when add a new attribute and save will backlist facebook attribute mapping. you can edit, delete, and mass deletes the facebook attribute mapping.
2.2: Add products and google product category.
Login to Magento Admin > Catalog > Products > Choose edit products > Facebook Shop Integration.
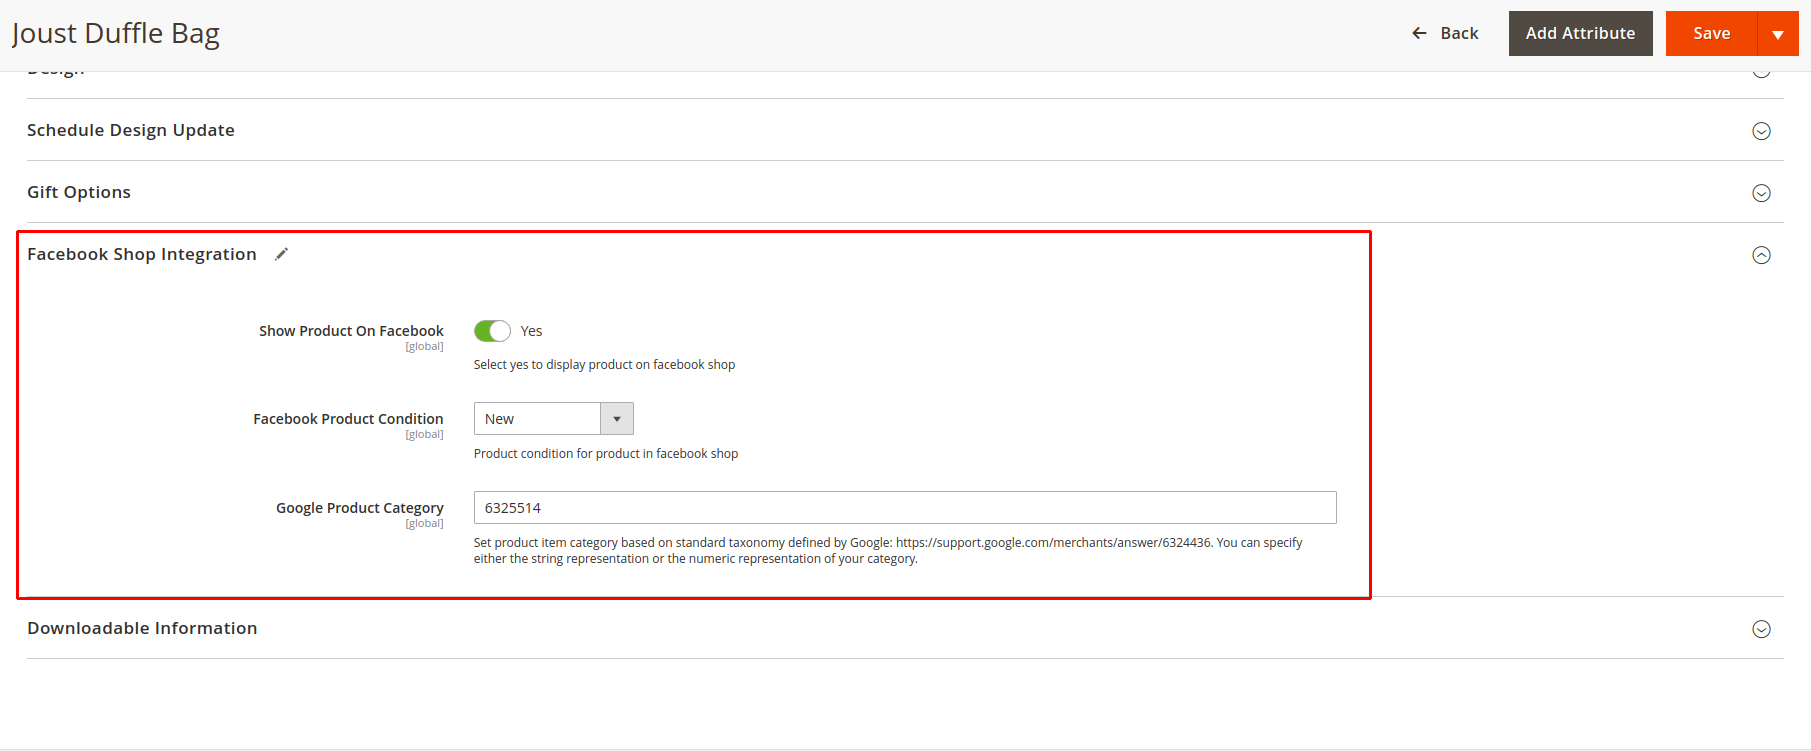
- Show Product On Facebook: Choose yes to display products on the Facebook shop.
- Facebook Product Condition: Product condition for the product in a Facebook shop. Select new, refurbished, used (fair), used (good), and used (like new).
- Google Product Category: Set product item category based on standard taxonomy defined by Google: https://support.google.com/merchants/answer/6324436. You can specify either the string representation or the numeric representation of your category.
Login to Magento Admin > Catalog > Categories > Choose category > Facebook Shop Integration.

- Google Product Category: Set category based on standard taxonomy defined by Google: https://support.google.com/merchants/answer/6324436. You can specify either the string representation or the numeric representation of your category.
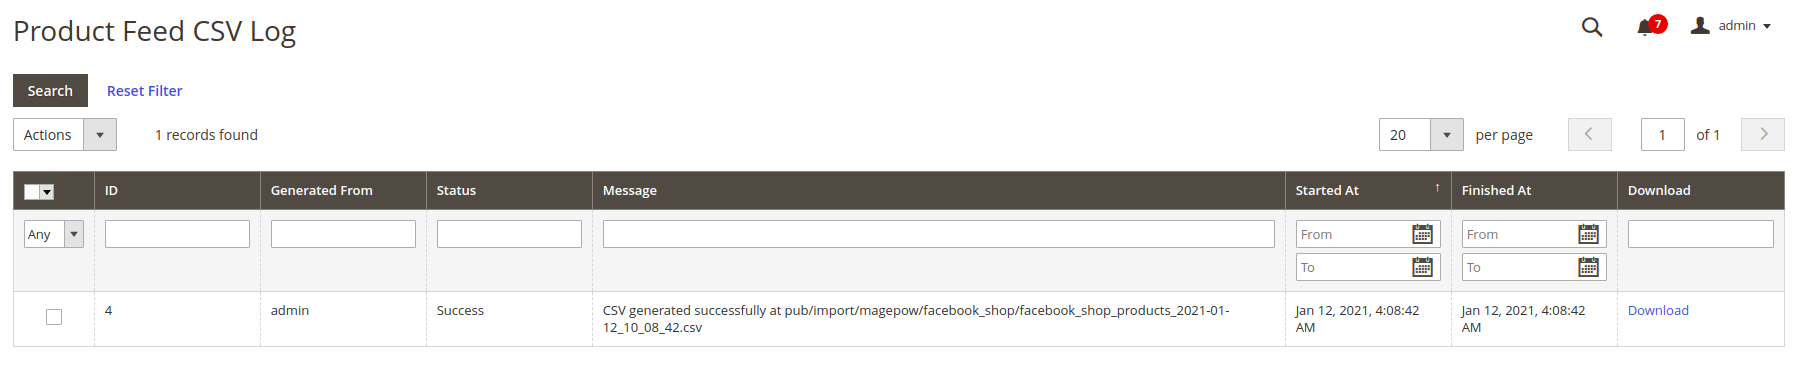
2.3: Facebook feed CSV Log
When configuring, add product and google product category, we create CSV file by.
Magepow > Configurations > General Configuration > Generate CSV for Facebook Shop > Click Generate CSV.
After generating the file CSV it will save in the Facebook feed CSV log.
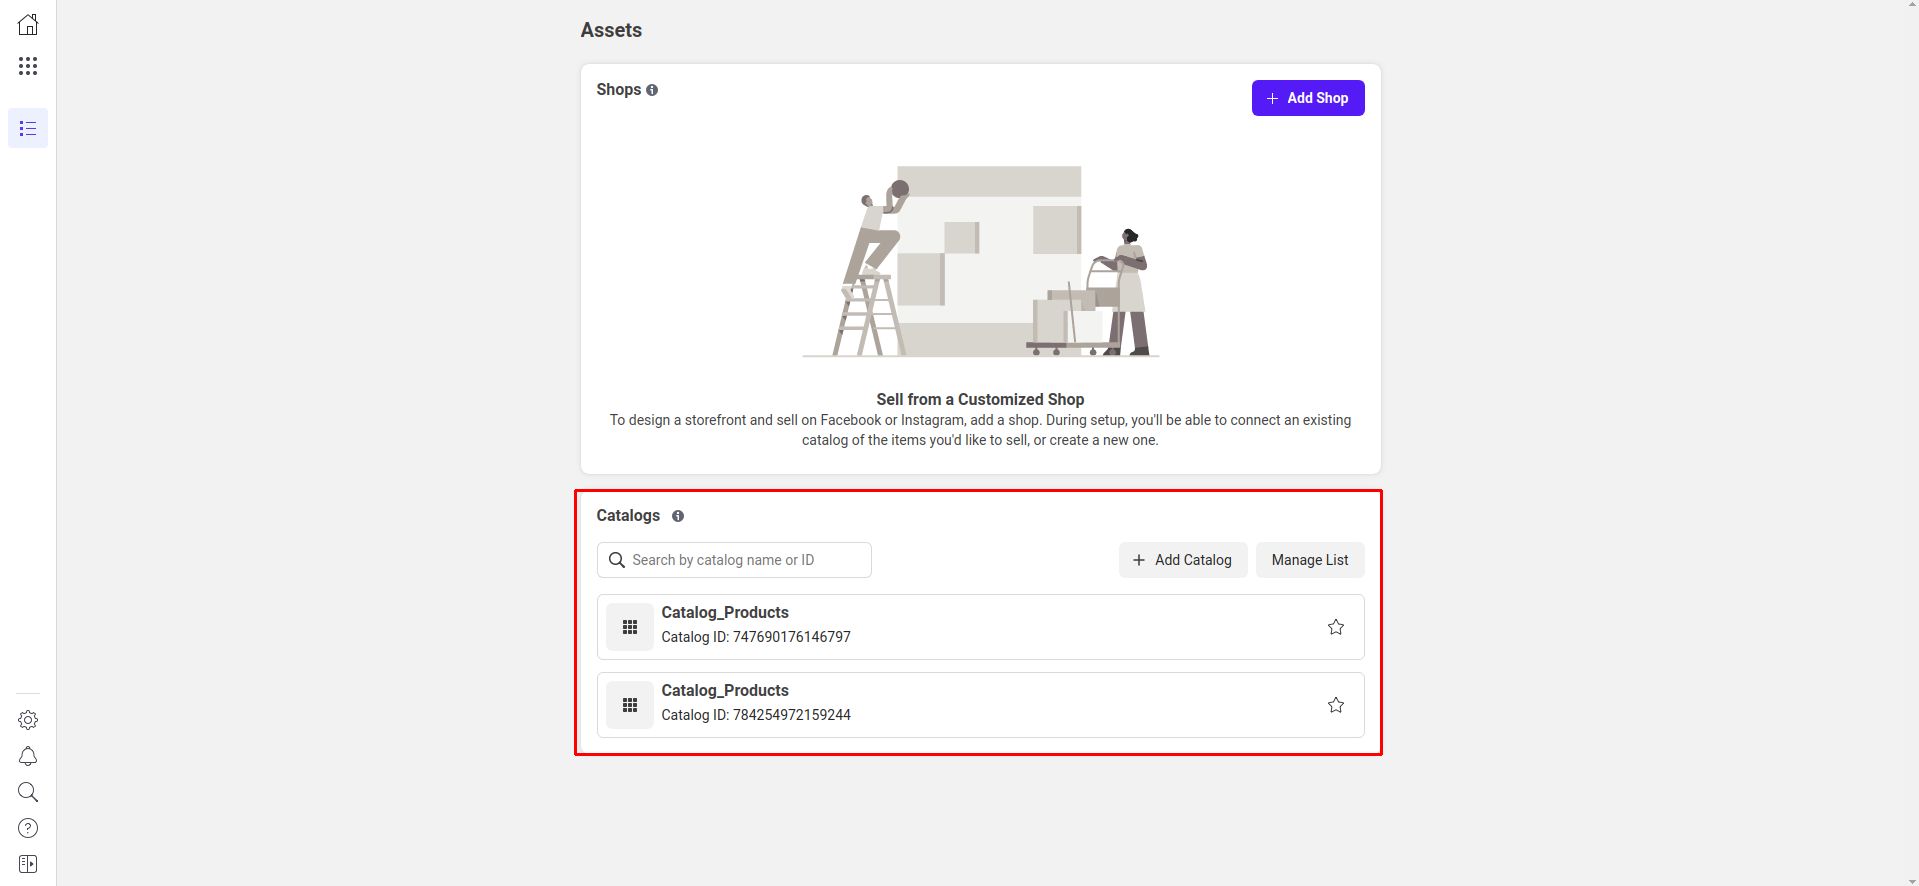
2.4: Facebook commerce manager and Facebook store.
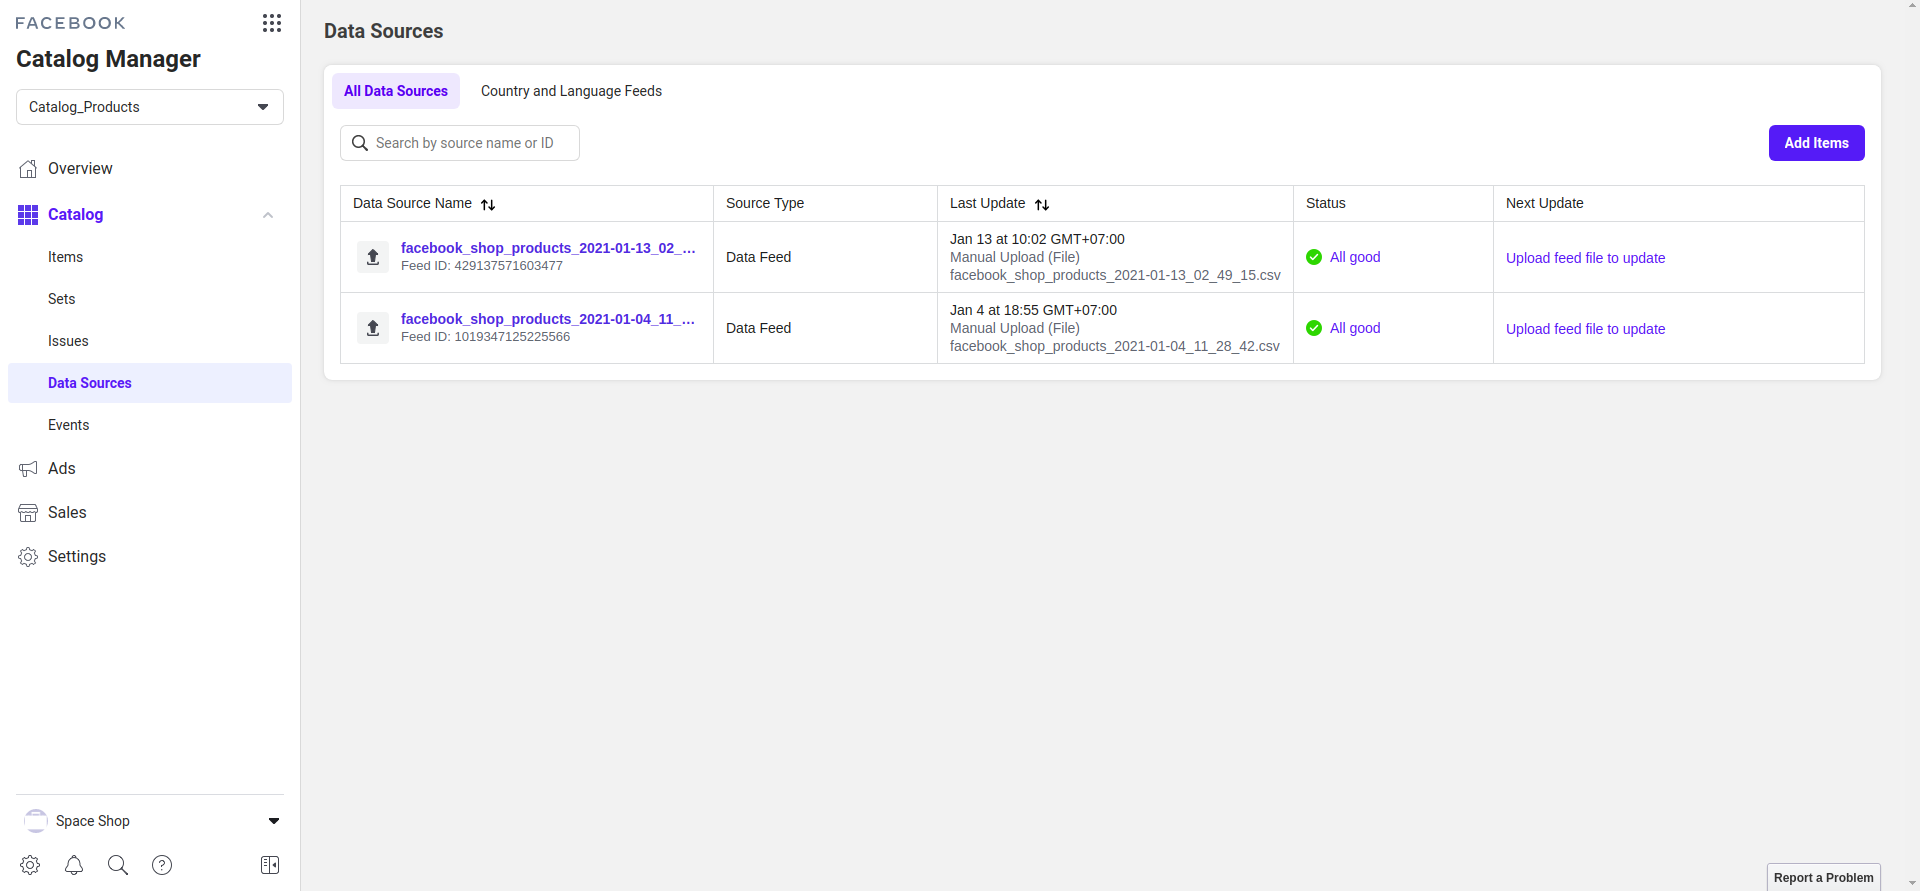
Step 1: Click Catelog_products or can create a new one if not already in website Commerce_manager
Step 2: Click add items.
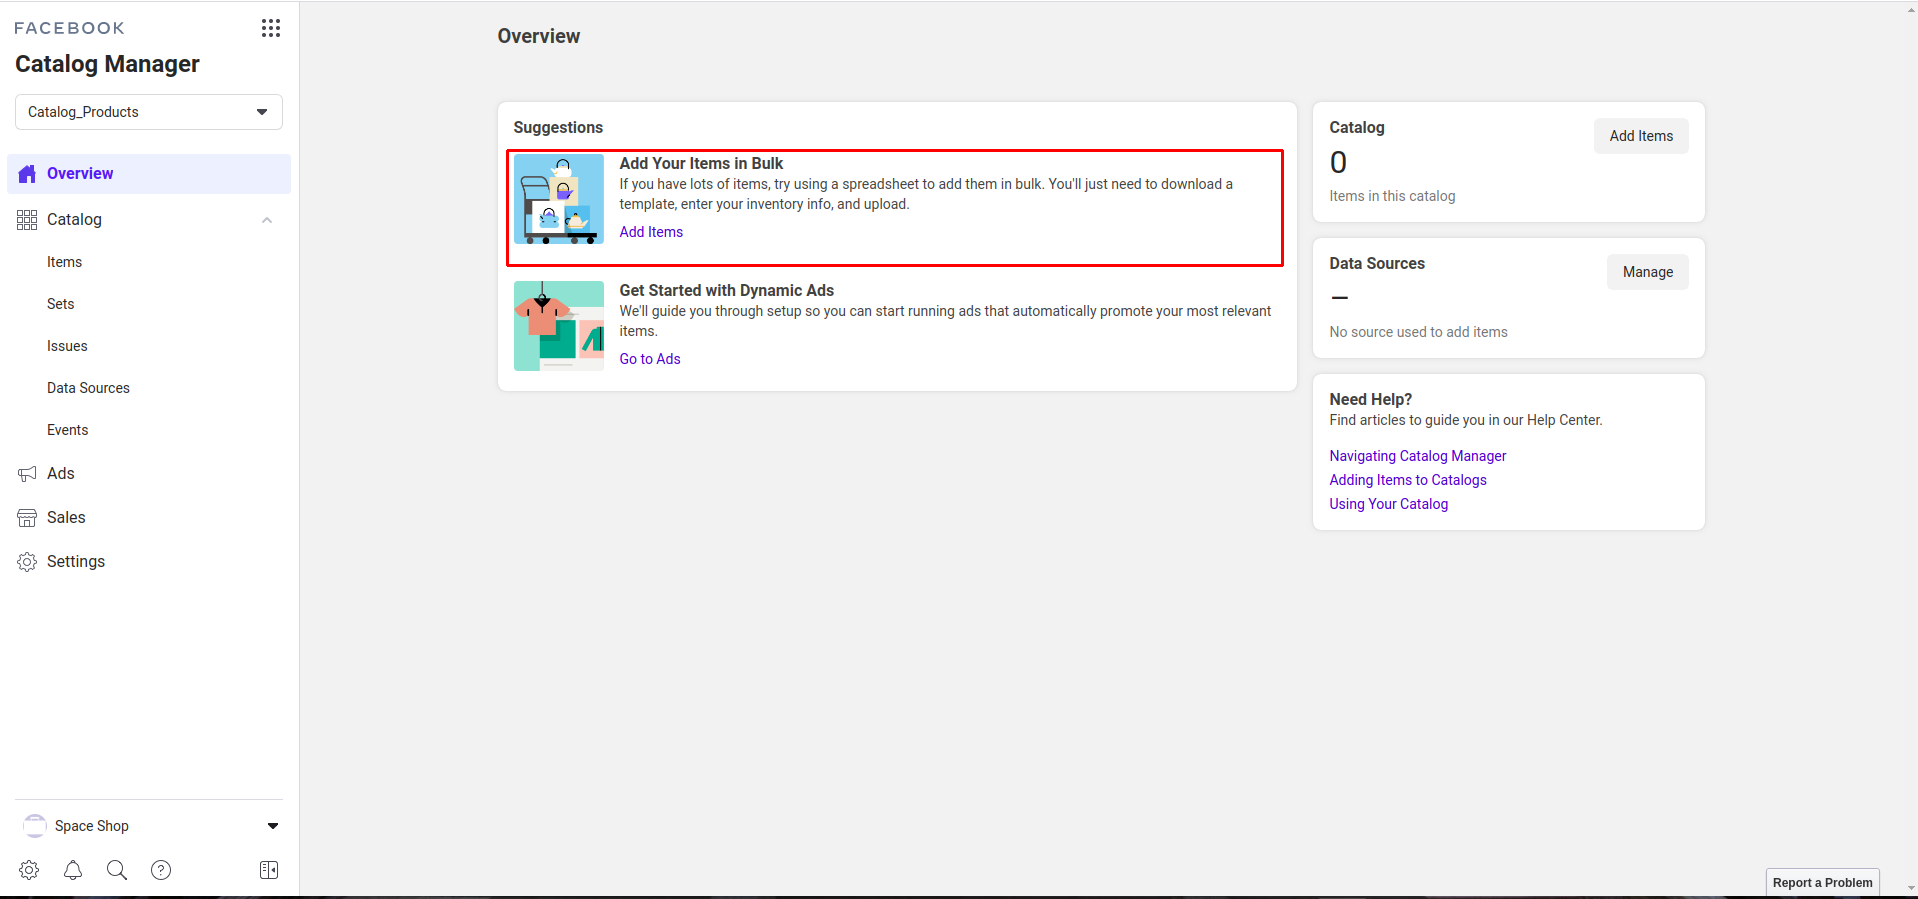
Step 3: Data Source.
Step 4: Choose upload option.
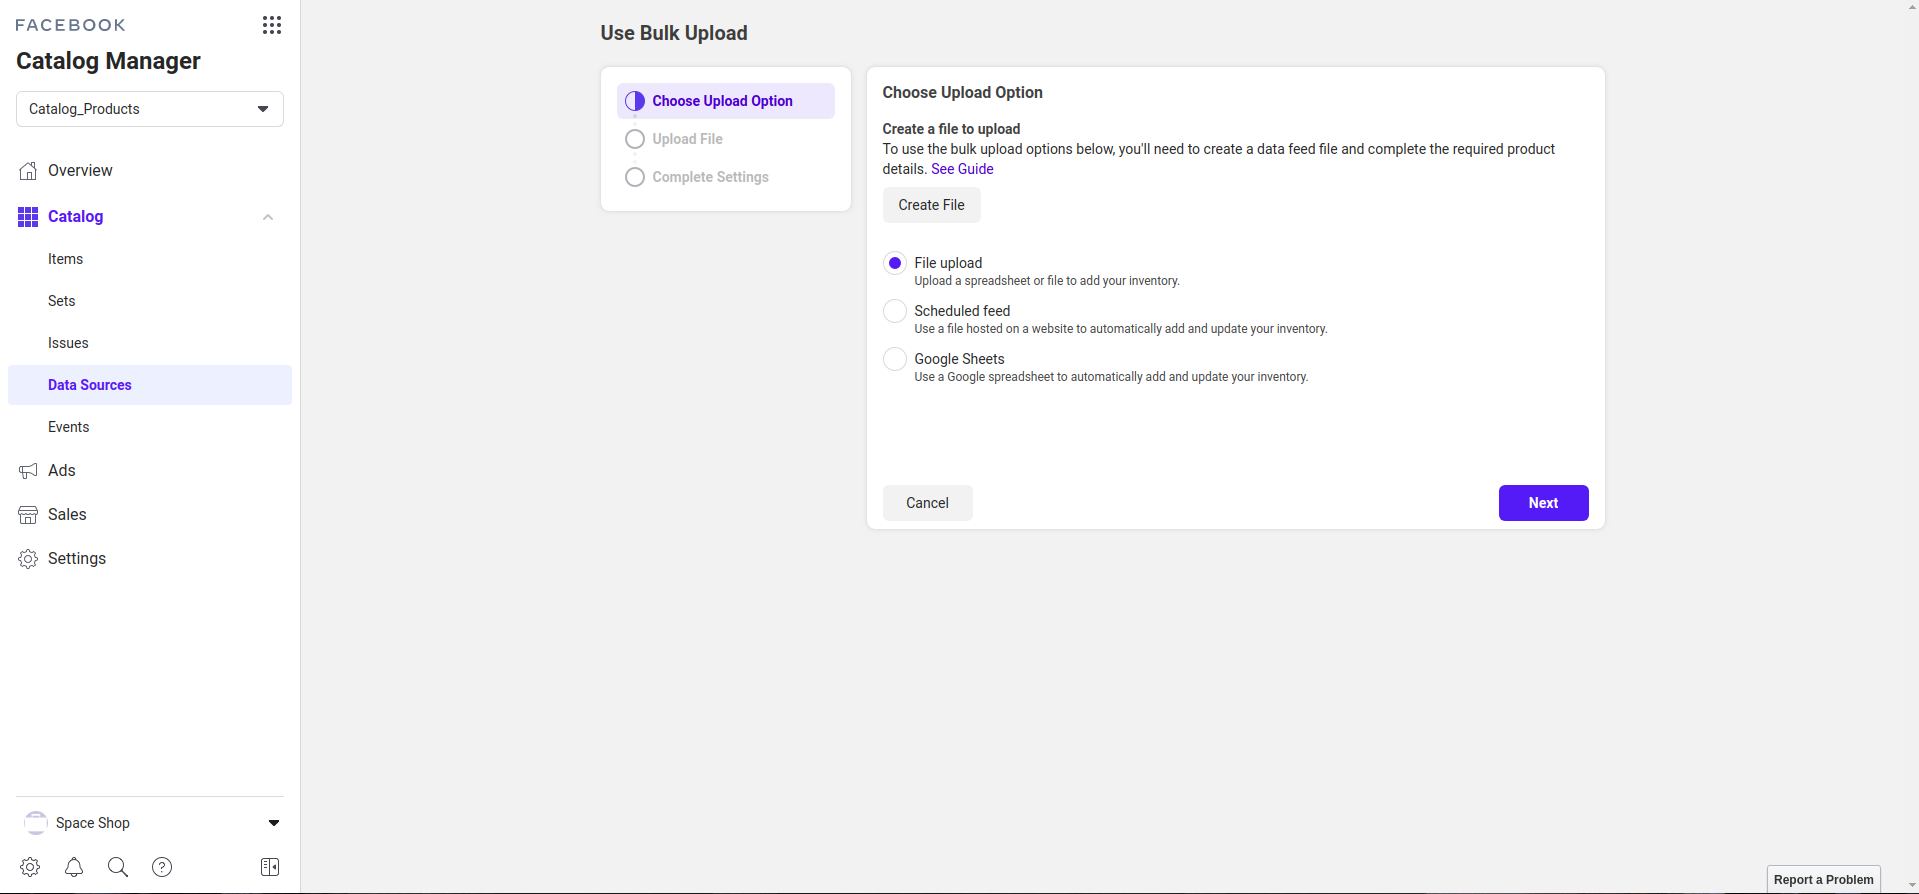
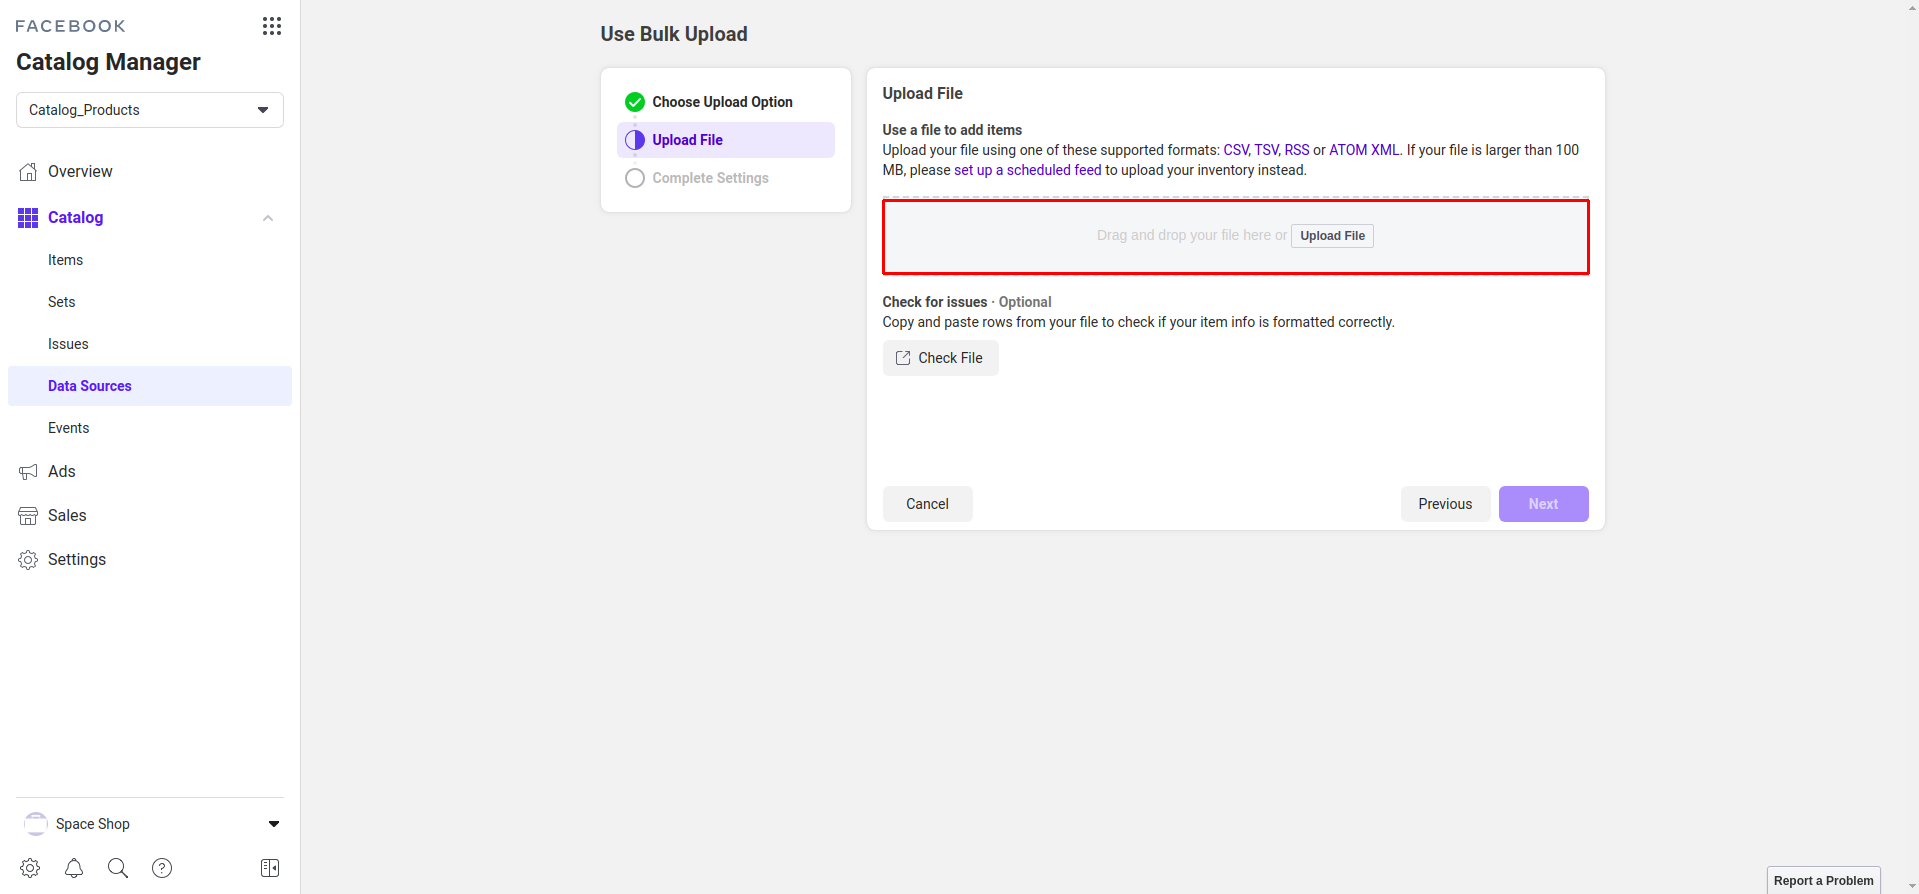
Step 5: Choose file upload.
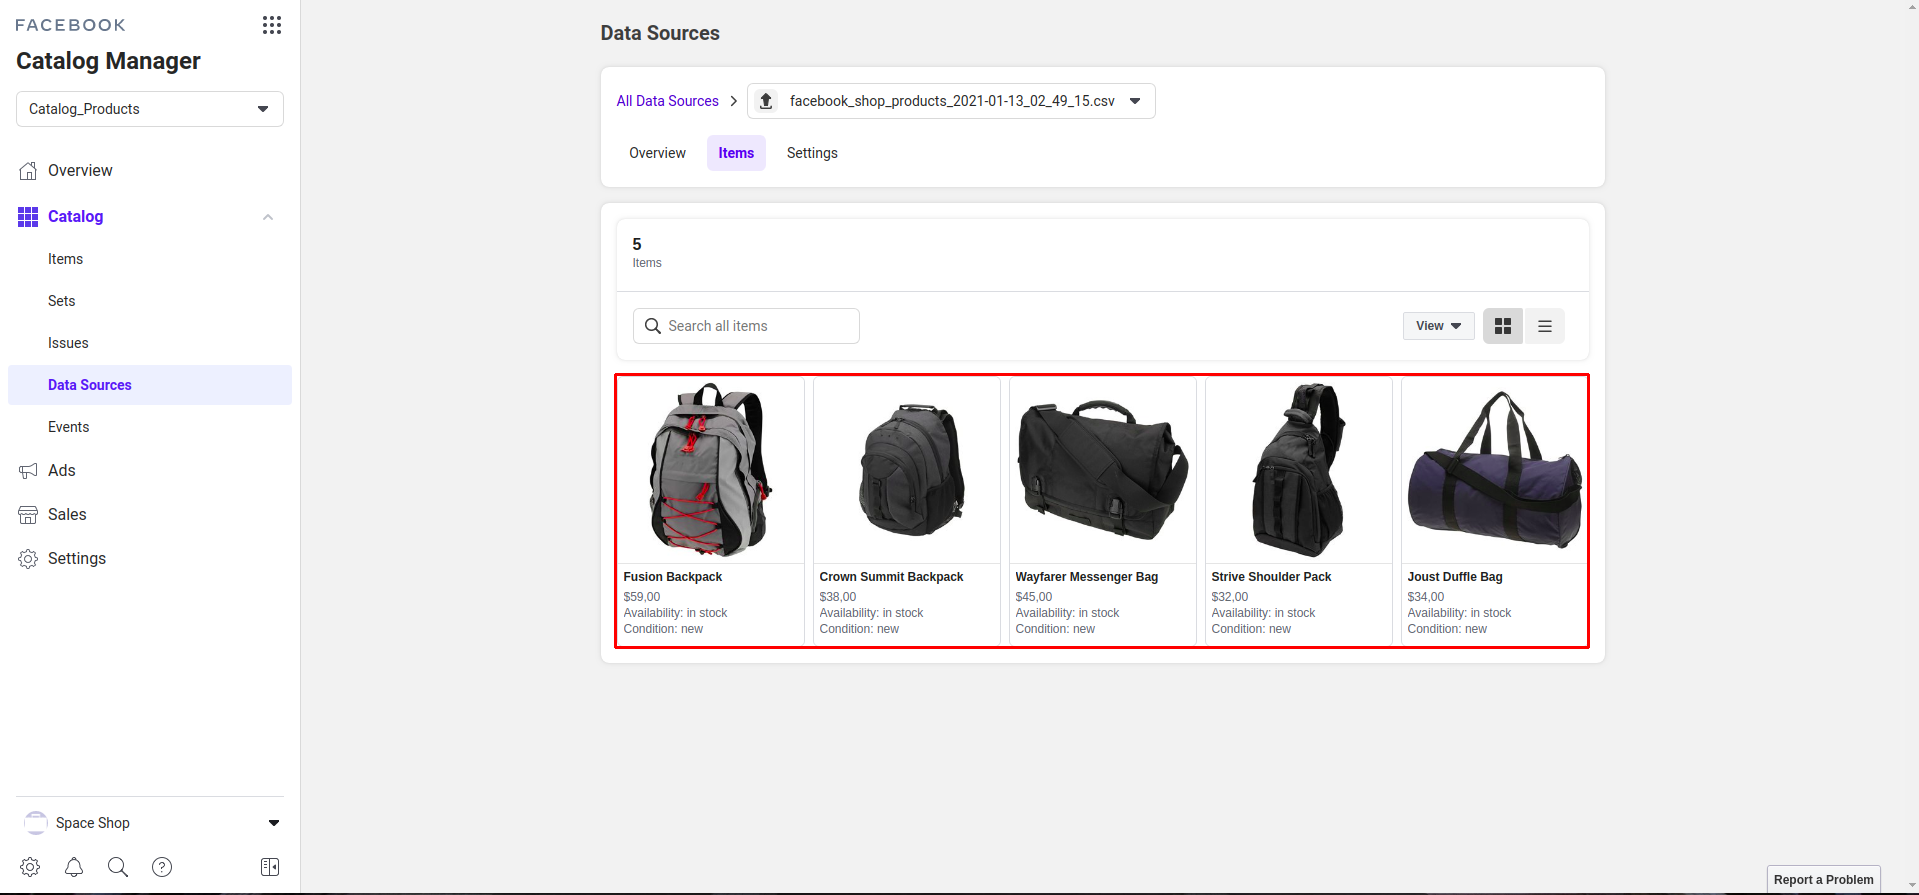
Step 6: Complete settings, find and verify uploaded products as shown below.
Step 7: Product details in facebook shop.
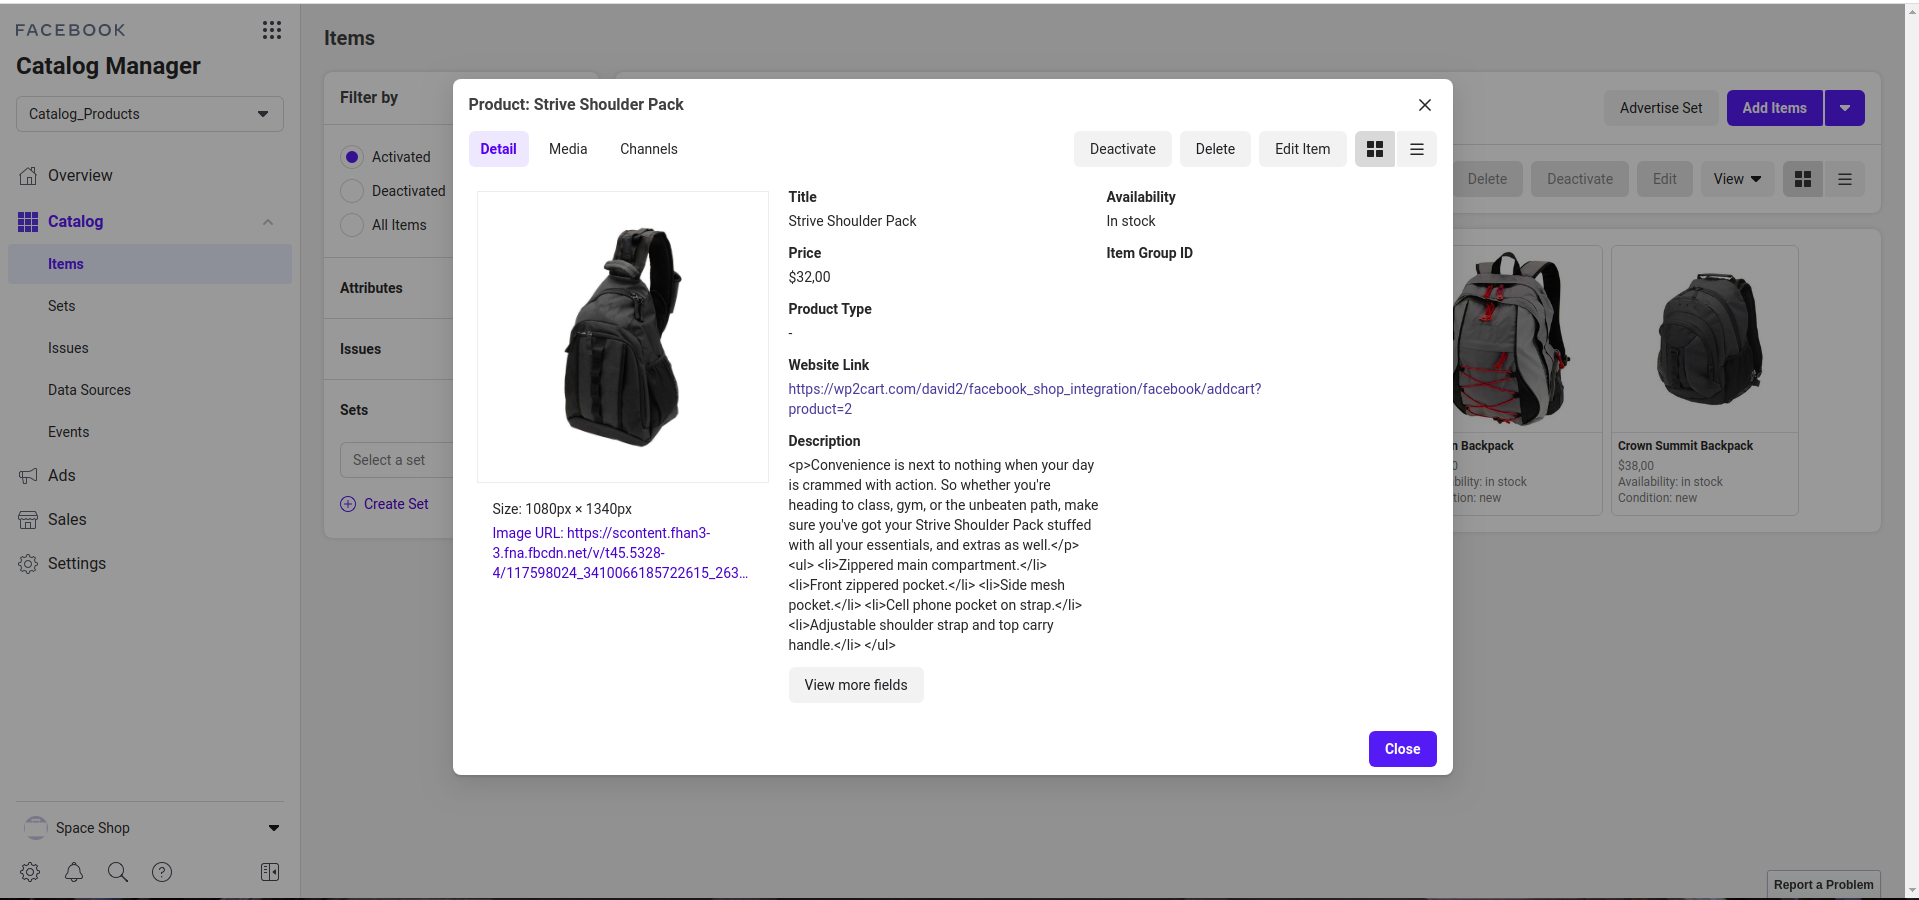
On clicking of the “Checkout on website”, it will add the product to the cart and redirect the Facebook user to your website.

III - Custom Support
1 - Support
- Ticket Support: http://alothemes.com/ticket. If you have found any bugs or have some other problems with this extension. If the problem is not covered there, you can contact us via support center. We will respond as soon as possible (within 24 – 48 hours, usually much faster)
2 - Contact
- Support Email support@magepow.com
- Contact Sales: contact@magepow.com